Install NTP (Chrony) On CentOS 8
NTP is an old, widely known and cross-platform protocol designed to synchronize the clocks of computers over a network. It commonly synchronizes a computer to Internet time servers or other sources, such as a radio or satellite receiver or telephone modem service. It can also be used as a time source/server for client systems.
Chrony is an implementation of NTP, and it is a replacement for the old Ntpd used in previous versions of enterprise Linux operating systems.
In this article, we will show you how to install and configure the NTP server and client using chrony package in CentOS 8 Linux distribution.
1. Install Chrony On CentOS 8
To install the chrony suite, use the following DNF package manager as follows. This command will install a dependency called timedatex.
# dnf install chrony
Example output:
# dnf install chrony
Last metadata expiration check: 0:04:08 ago on Sun Sep  6 14:36:05 2020.
Dependencies resolved.
================================================================================
 Package          Architecture     Version               Repository        Size
================================================================================
Installing:
 chrony           x86_64           3.5-1.el8             BaseOS           271 k

Transaction Summary
================================================================================
Install  1 Package

Total download size: 271 k
Installed size: 676 k
Is this ok [y/N]: y
Now start the chronyd service, enable it to auto start at system boot and verify the running status using the following systemctl commands.
# systemctl start chronyd
# systemctl status chronyd
# systemctl enable chronyd
2. Configure NTP Server Using Chrony
In this section, we will configure the servers as an NTP server, which will act as a remote time server for all clients in your organization.
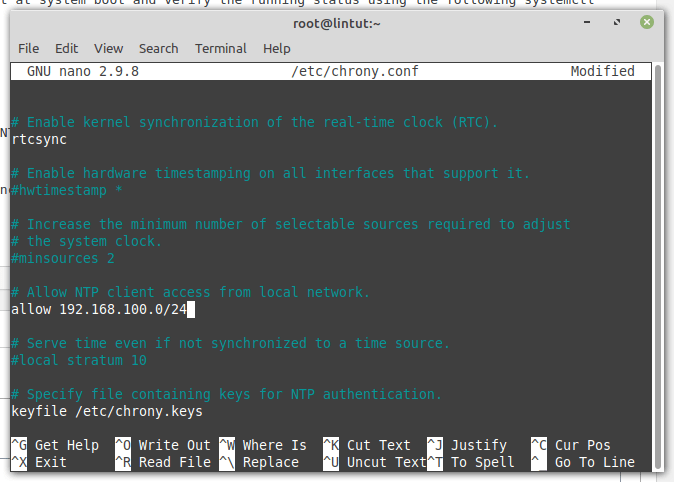
# nano /etc/chrony.conf
Then look for the allow configuration directive and uncomment it and set its value to the network or subnet address from which the clients are allowed to connect.
allow 192.168.100.0/24
Restart the Chrony service to apply the configuration change.
# systemctl restart chronyd
Add the firewall rules to allow NTP requests from clients.
# firewall-cmd --permanent --add-service=ntp
# firewall-cmd --reload
Once you have configured the NTP server, go to the client machine and add this server as an NTP server.
3. Configure NTP Client Using Chrony
Install the Chrony package if the package is not already installed.
# dnf install chrony
Now, we will configure this machine as an NTP client, which will reach the NTP server we configured earlier for time synchronization.
# nano /etc/chrony.conf
Comment out the existing server directives and add a new server directive for our NTP server.
server 192.168.100.18
Then, restart the Chrony service.
# systemctl restart chronyd
Enable Chrony service on system startup.
# systemctl enable chronyd
Now run the following command to show the current time sources (NTP server) that chronyd is accessing, which should be your NTP server address.
# chronyc sources
Output:

210 Number of sources = 1
MS Name/IP address         Stratum Poll Reach LastRx Last sample
===============================================================================
^? 192.168.100.18                  3   6     1    25  +2525us[+2525us] +/-   87ms
By default, NTP client will perform a time synchronization every 64 seconds. However, you can adjust the clock manually without waiting for the next time sync polling.
# chronyc makestep
For more information on how to use the chronyc utility, run the following command.
# man chronyc
Conclusion
In this article, we have shown how to install and configure an NTP server in CentOS 8 using chrony suite. We also showed how to configure an NTP client on CentOS 8.
If you have any questions about this article, use the comment form below to ask any questions or queries.
