

Tvheadend is a TV streaming server and digital video recorder for Linux FreeBSD and Android supporting DVB-S, DVB-S2, DVB-C, DVB-T, ATSC, ISDB-T, IPTV, SAT>IP and HDHomeRun as input sources.
Tvheadend offers the HTTP (VLC, MPlayer), HTSP (Kodi, Movian) and SAT>IP streaming.
Multiple EPG sources are supported (over-the-air DVB and ATSC including OpenTV DVB extensions, XMLTV, PyXML).
The Analog video (V4L) is supported directly up to version 3.4.
In recent version, the pipe:// source (in IPTV network) might be used to obtain the MPEG-TS stream generated by ffmpeg/libav from a V4L device.
In this guide I’ll try to explain to you how to install Tvheadend (open source TV streaming server) on Ubuntu 18.04 Server.
Install Tvheadend on Ubuntu 18.04 server
1. Install Tvheadend Required Packages and add the Repository PGP key
First, install required package:
$ sudo apt-get -y install coreutils wget apt-transport-https lsb-release ca-certificates
Now, add the Tvheadend Repository PGP key:
$ sudo wget -qO- https://doozer.io/keys/tvheadend/tvheadend/pgp | sudo apt-key add -
2. Add Tvheadend repository
Add the repository:
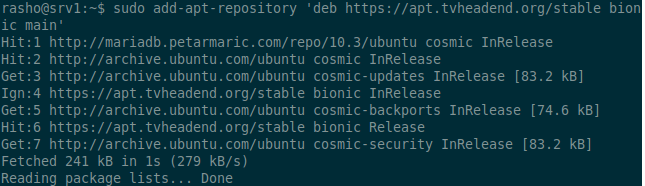
$ sudo add-apt-repository 'deb https://apt.tvheadend.org/stable bionic main'
Example output:

3. Install Tvheadend
Refresh the available packages and install. Keep an eye out for anything that mentions TVHeadend.
$ sudo apt-get update
$ sudo apt-get install tvheadend -y
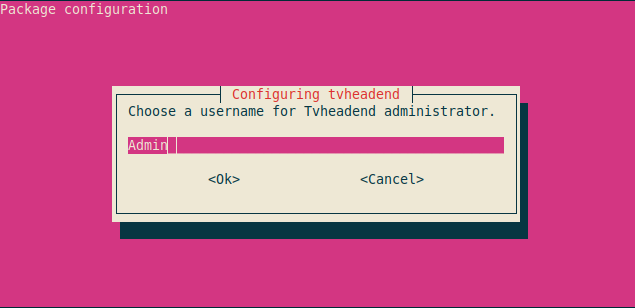
Set a username of the TVHeadend administrator. I used Admin.

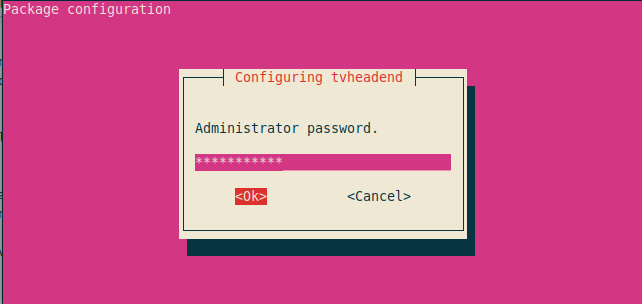
Set Tv headend administrator password:

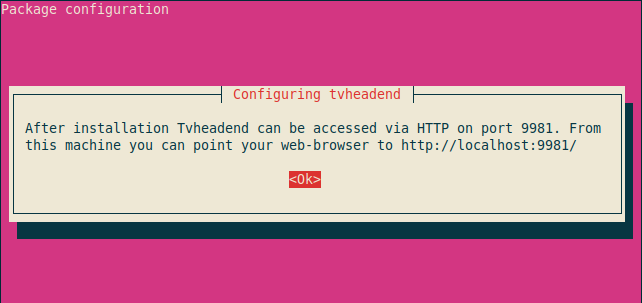
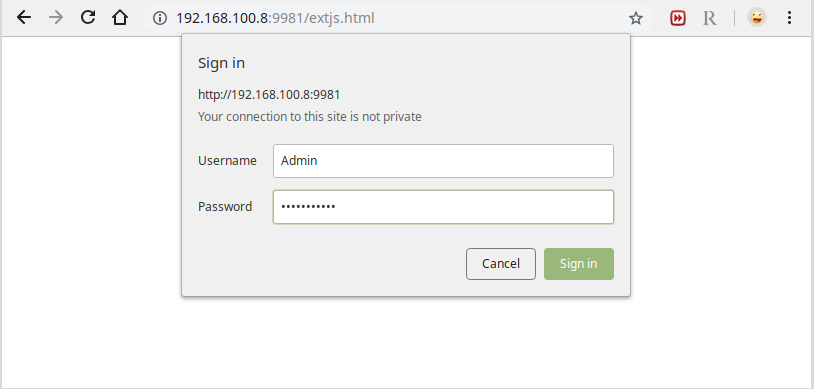
Once the installation is complete, you can access via http://localhost:9981 or http://ip.add.re.ss:9981
Access TVHeadend URL with your favorite browser and login.
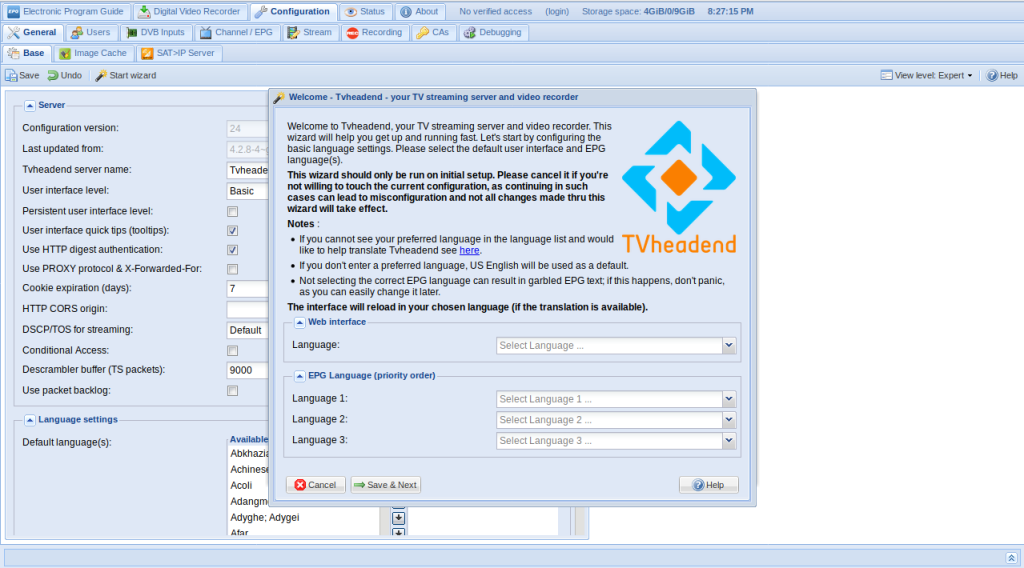
The following Welcome setup wizard will prompt, click on Cancel.


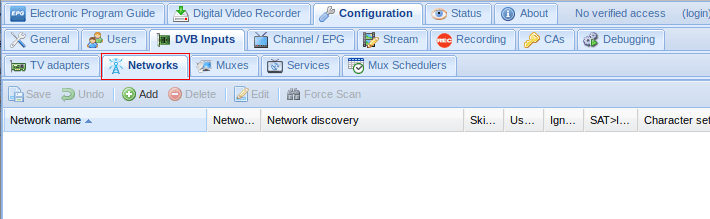
Go to Configuration, DVB Inputs and TV Adapters. Verify that your TV Tuner cards are being detected. I have had a lot of luck with the tuner cards I have thrown at TVHeadend. If you stick with the Avermedia/ Leadtek brands you should be okay.


Now that we have verified that the tuner is working we need to setup the scanning range to tell the tuner what frequency to scan in. The next couple of steps are very similar to setting up a new tv. Click on Networks beside TV Adapters.
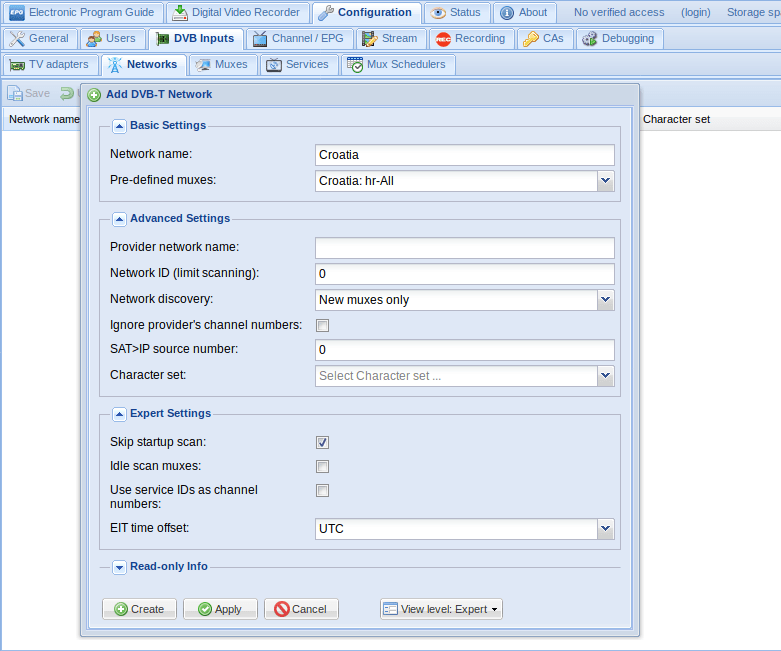
Select Add, Click on the drop down arrow and select DVB-T Network.


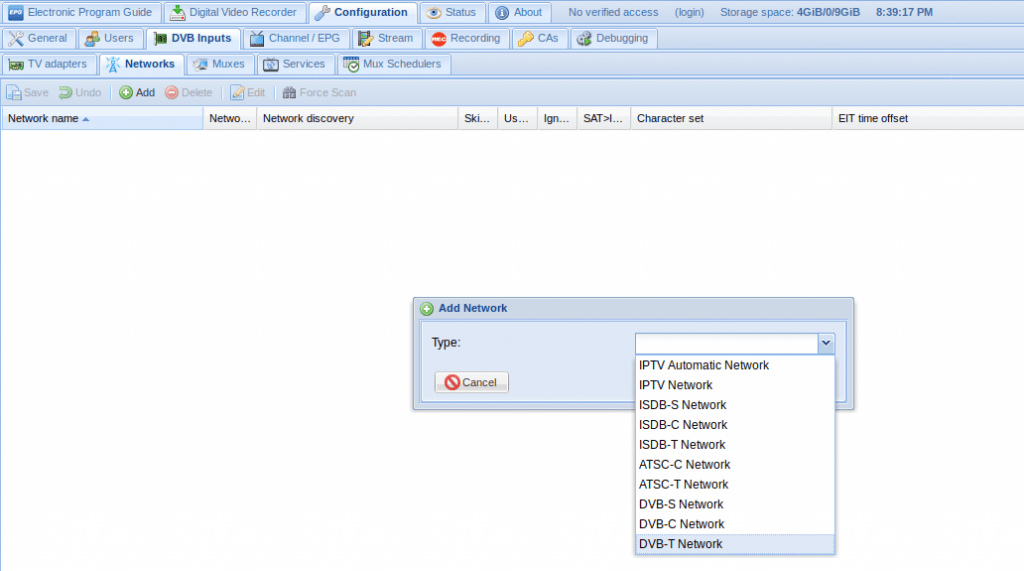
In the Add DVB-T Network, enter the following and select Create:

Go back to the TV Adapters tab and select the tv adapter. On the right hand side select the drop down on Networks and select Croatia and Enable the adapter. Click on save.
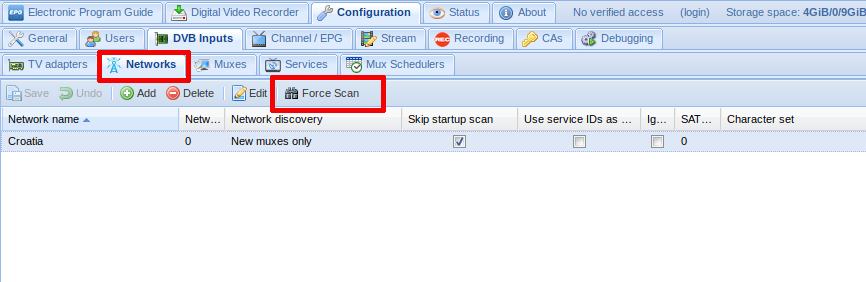
Now that we have added a way for the TV tuner to scan channels, lets scan some channels. Go back into the Networks tab and select the Croatia network, and select Force Scan.
Once everything is finished up you should see something similar like the following:
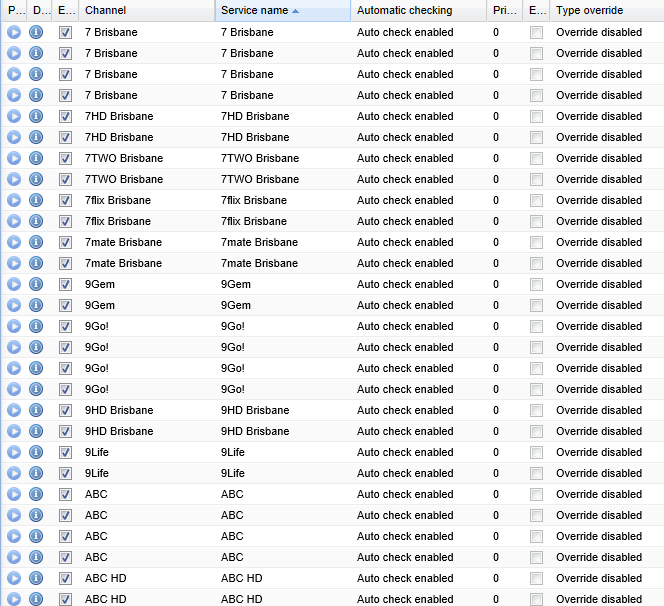
We now need to add them finally to TVHeadend. Click on Map Services and Map all services.

Click on Map services.
We now need to test a couple of channels to ensure that everything is working as it should. Click on the Play button on one of the channels and you should download a .m3u file.
Open it up with VLC and you should see live TV start to play. Ensure that the quality and sound is okay.


Congratulations! You’ve successfully install and configure tvheadend iptv server on Ubuntu 18.04 server. If you have any queries, share them with us via the comment form below.