How to use “dmesg” command on Linux Systems
13 ‘dmesg’ Commands for Troubleshooting and Collecting Information of Linux Systems
dmesg command is used to display the kernel related messages on Unix like systems. dmesg stands for “display message or display driver“. dmesg command retrieve its data by reading the kernel ring buffer. While doing troubleshooting on Linux systems, dmesg command becomes very handy, it can help us to identify hardware related errors and warnings, apart from this it can print daemon related messages on your screen.
Let’s throw some light on most famous tool called ‘dmesg’ command with their practical examples as discussed below. The exact syntax of dmesg as follows.
# dmseg [options...]
Following are the options that can be used in dmesg command
Options:
 -C, --clear                 clear the kernel ring buffer
 -c, --read-clear            read and clear all messages
 -D, --console-off           disable printing messages to console
 -E, --console-on            enable printing messages to console
 -F, --file            use the file instead of the kernel log buffer
 -f, --facility        restrict output to defined facilities
 -H, --human                 human readable output
 -k, --kernel                display kernel messages
 -L, --color[=]        colorize messages (auto, always or never)
                               colors are enabled by default
 -l, --level           restrict output to defined levels
 -n, --console-level  set level of messages printed to console
 -P, --nopager               do not pipe output into a pager
 -r, --raw                   print the raw message buffer
 -S, --syslog                force to use syslog(2) rather than /dev/kmsg
 -s, --buffer-size     buffer size to query the kernel ring buffer
 -u, --userspace             display userspace messages
 -w, --follow                wait for new messages
 -x, --decode                decode facility and level to readable string
 -d, --show-delta            show time delta between printed messages
 -e, --reltime               show local time and time delta in readable format
 -T, --ctime                 show human-readable timestamp (may be inaccurate!)
 -t, --notime                don't show any timestamp with messages
     --time-format   show timestamp using the given format:
                               [delta|reltime|ctime|notime|iso]
Let’s jump into the tips part now.
1. List all loaded drivers in kernel
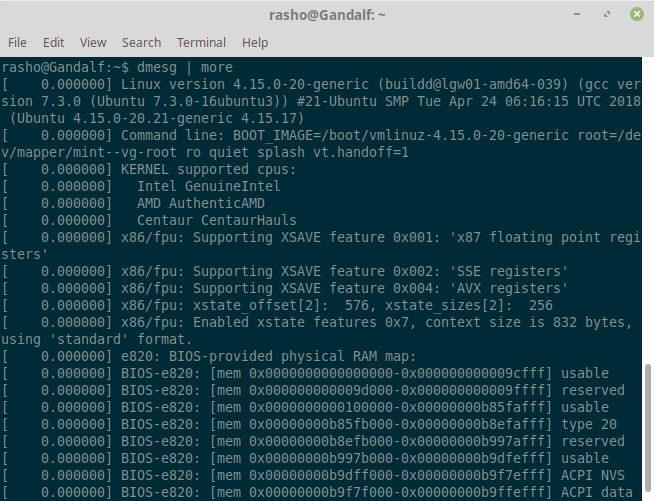
Open the terminal and type ‘dmesg’ command and then hit enter.
[box type=”note” align=”” class=”” width=””]We can use text-manipulation tools i.e. ‘more‘, ‘tail‘, ‘less‘ or ‘grep‘ with dmesg command.[/box]
# dmesg |more
Example output:
2. List all Detected Devices
To discover which hard disks has been detected by kernel, you can search for the keyword “sda” along with “grep” like shown below:
$ dmesg | grep sda
[    4.989254] sd 0:0:0:0: [sda] 1250263728 512-byte logical blocks: (640 GB/596 GiB)
[    4.989263] sd 0:0:0:0: [sda] Write Protect is off
[    4.989265] sd 0:0:0:0: [sda] Mode Sense: 00 3a 00 00
[    4.989280] sd 0:0:0:0: [sda] Write cache: enabled, read cache: enabled, doesn't support DPO or FUA
[    5.053921]  sda: sda1 sda2
[    5.054436] sd 0:0:0:0: [sda] Attached SCSI disk
[ 4266.344111] sd 0:0:0:0: [sda] Synchronizing SCSI cache
[ 4266.344778] sd 0:0:0:0: [sda] Stopping disk
[ 4268.621944] sd 0:0:0:0: [sda] Starting disk
[ 6875.213393] sd 0:0:0:0: [sda] Synchronizing SCSI cache
[ 6875.352287] sd 0:0:0:0: [sda] Stopping disk
[ 6877.025739] sd 0:0:0:0: [sda] Starting disk
[box type=”note” align=”” class=”” width=””]The ‘sda’ first SATA hard drive, ‘sdb’ is the second SATA hard drive and so on. Search with ‘hda’ or ‘hdb’ in the case of IDE hard drive.[/box]
3. Display messages related to RAM, Hard disk, USB drives and Serial ports
It’s difficult to search particular string due to length of dmesg output. So, filter the lines with are having string like ‘usb‘ ‘dma‘ ‘tty‘ and ‘memory‘ etc. The ‘-i’ option instruct to grep command to ignore the case (upper or lower case letters).
~]# dmesg | grep -i memory
# dmesg | grep -i dma
# dmesg | grep -i usb
# dmesg | grep -i tty
Or
# dmesg | grep -E "memory|dma|usb|tty"
4. Display colored messages (dmesg command output)
Use ‘-L’ option in dmesg command if you want to print the colored messages,
# dmesg -L
Example output:
5. View ethernet link status (UP/DOWN)
In the example below, dmesg indicates that the eth0 link is in active state during the boot itself.
# dmesg | grep eth

6. Read and clear dmesg buffer logs
If you want to clear dmesg logs after the reading them, then you can use the option -C in dmesg command,
# dmesg -C
7. Monitoring dmesg in real time
Use ‘–follow’ option in dmesg command to view real time dmesg logs, example is shown below,
# dmesg --follow
Some distro allows command ‘tail -f /var/log/dmesg’ as well for real time dmesg monitoring.
# watch "dmesg | tail -20"
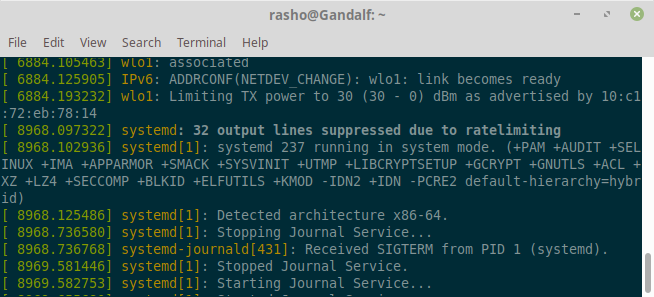
8. Limit the dmesg output to specific facility like daemon
If you want to limit the dmesg output to specific facility like daemon then use the option “–facility=daemon” in dmesg command.
# dmesg --facility=daemon
9. Enable timestamps in dmesg logs
Sometimes, you may want a timestamp to be associated with the messages dmesg produces. This can be done using the -T command line option, which produces human readable timestamps.
# dmesg -T
In case, if you want timestmaps along with decode facility and levels in dmesg command output then use “-Tx” option,
# dmesg -Tx
By default, the timestamp from dmesg output is not human readable. To make it human readable, you can use – -ctime parameter.
# dmesg - -ctime
10. Display raw message buffer using ‘-r’ option
Use ‘-r’ option in dmesg command to display raw message buffer.
# dmesg -r
11. Force dmesg command to use syslog
There can be some situations where we want dmesg to get its data from syslog rather than /dev/kmsg. This can be easily achieved using the option “-S“, example is shown below:
# dmesg -S
dmesg command logs are stored in the file “/var/log/dmesg”
12. Print only first 20, and only last 20 lines of output
The ‘head’ along with dmesg will show starting lines i.e. ‘dmesg | head -20’ will print only 20 lines from the starting point.
# dmesg | head -20
The ‘tail’ along with dmesg command will print only 20 last lines, this is useful in case we insert removable device.
# dmesg | tail -20
13. Print log level
dmesg can also print log based on level. To print output like this, use – -level parameter
# dmesg - -level=err
Sample output :
[ 0.000000] tsc: Fast TSC calibration failed
[ 19.595760] piix4_smbus 0000:00:07.0: SMBus base address uninitialized - upgrade BIOS or use force_addr=0xaddr
This option will print error messages only.
Conclusion
The dmesg command is useful as dmesg records all the system changes done or occur in real time. As always you can man dmesg to get more information.
