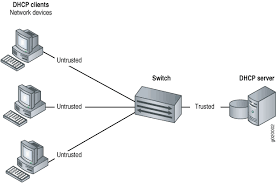
The Dynamic Host Configuration Protocol (DHCP) is a standardized network protocol used on Internet Protocol (IP) networks for dynamically distributing network configuration parameters, such as IP addresses for interfaces and services. With DHCP, computers request IP addresses and networking parameters automatically from a DHCP server, reducing the need for a network administrator or a user to configure these settings manually.
In this article will explain how to install and configure DHCP server on Ubuntu server 14.04/14.10/15.04
Install DHCP server on Ubuntu Server 14.04/14.10/15.04
To install a DHCP server on Ubuntu Server 14.04/14.10/15.04 enter the following command:
# sudo apt-get install isc-dhcp-server -y
Configure DHCP Server
The DHCP server is not difficult to configure. After installing, open /etc/default/isc-dhcp-server file:
# sudo nano /etc/default/isc-dhcp-server
and assign the network interface:
......
INTERFACES="eth0"
First, we need to define to below values in dhcpd.conf file located in /etc/dhcp/ directory.
Example scenario:
Network : 192.168.1.0/24
Range : 192.168.1.50 ( Starting IP ) – 192.168.1.100 ( Ending IP )
Gateway : 192.168.1.1
Primary DNS : 192.168.1.2
Sec DNS : 8.8.8.8
# sudo nano /etc/dhcp/dhcpd.conf
and add the below code after making changes as per your network values.
# option definitions common to all supported networks...
default-lease-time 600;
max-lease-time 7200;
# If this DHCP server is the official DHCP server for the local
# network, the authoritative directive should be uncommented.
authoritative;
# Use this to send dhcp log messages to a different log file (you also
# have to hack syslog.conf to complete the redirection).
log-facility local7;

subnet 192.168.1.0 netmask 255.255.255.0 {  #network
	range 192.168.1.50 192.168.1.100; # Range
	option domain-name-servers 192.168.1.2, 8.8.8.8; #Pri DNS , Sec DNS
	option domain-name "lintut.com"; #Domain name
	option routers 192.168.1.1; #Gateway
	option broadcast-address 192.168.1.255; #Broadcast
	default-lease-time 600;
	max-lease-time 7200;
}
After making all the changes you want, save and close the configuration file. Restart the dhcp service by using the following command:
# sudo service isc-dhcp-server restart
That’s it. DHCP server is up and ready.
Cheers!
