

GitLab is an open source repository manager based on Rails developed by GitLab Inc. It is a web based git repository manager that allows your team collaborate on coding, testing and deploying applications. GitLab provides several features, including wikis, issue tracking, code reviews, and activity feeds.
In this article, we will explain how to install and configure Gitlab (Git-repository manager) on CentOS 7 or RHEL 7 Linux distributions.
Installing Required Dependencies
Refresh the local package index and install the dependencies with the following commands:
# yum install curl policycoreutils-python openssh-server
Next, install Postfix service to send notification emails, and enable it to start at system boot, then check if its up and running using following commands.
# yum install postfix
# systemctl start postfix
# systemctl enable postfix
# systemctl status postfix
Installing GitLab
GitLab installation is pretty straight forward process. We will install the GitLab CE package using the yum package manager.
Start by adding the GitLab repository to your system sources list using the following curl command:
# curl https://packages.gitlab.com/install/repositories/gitlab/gitlab-ce/script.rpm.sh | sudo bash
The script will enable the repository and install necessary dependencies. Once complete, install the GitLab package by running the following command:
# sudo yum install gitlab-ce
You will be prompted to accept the GitLab repository GPG keys. Type y and press Enter.
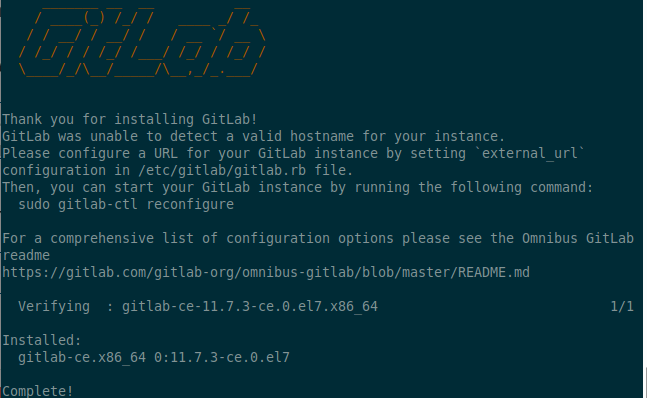
The installation process may take a while and after a successful installation, you will see the following output:

Once changed, don’t forget to reconfigure gitlab to apply the recent changes in the configuration file using following command.
# gitlab-ctl reconfigure
Adjusting the Firewall Rules
If you have a system firewall enabled, you need to open port 80 (HTTP) and 443 (HTTPS) to allow connections in the system firewall.
# sudo firewall-cmd --permanent --zone=public --add-service=http
# sudo firewall-cmd --permanent --zone=public --add-service=https
# sudo firewall-cmd --reload
Perform Initial Gitlab Setup
Now, open a web browser and access your GitLab instance using the following URL you set during installation.
https://ip.add.re.ss.
The first time you access the web interface you’ll be prompted to set the password for the administrative account.

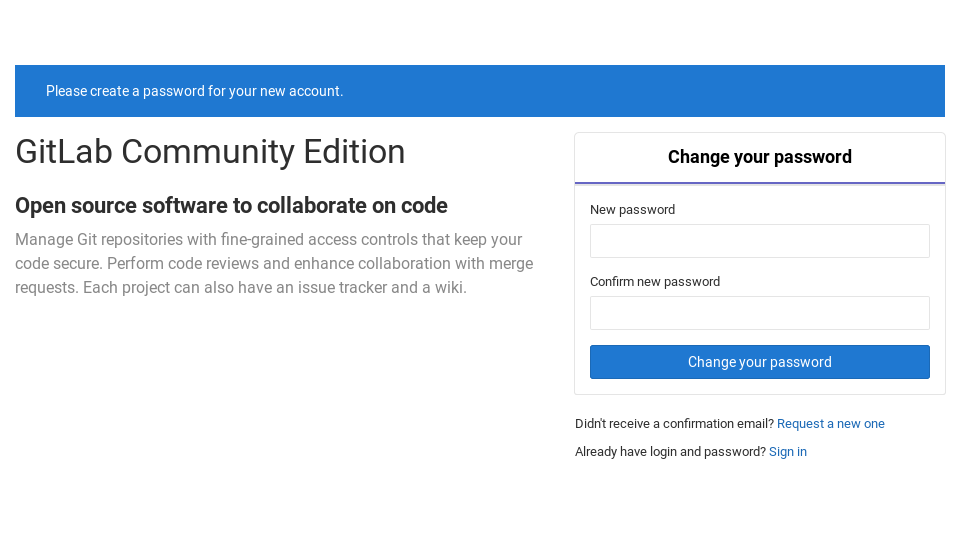
Enter a secure password and click on the Change your password button when you are finished. Once you set, it will be redirected back to the login screen and login with username root and the password you set.


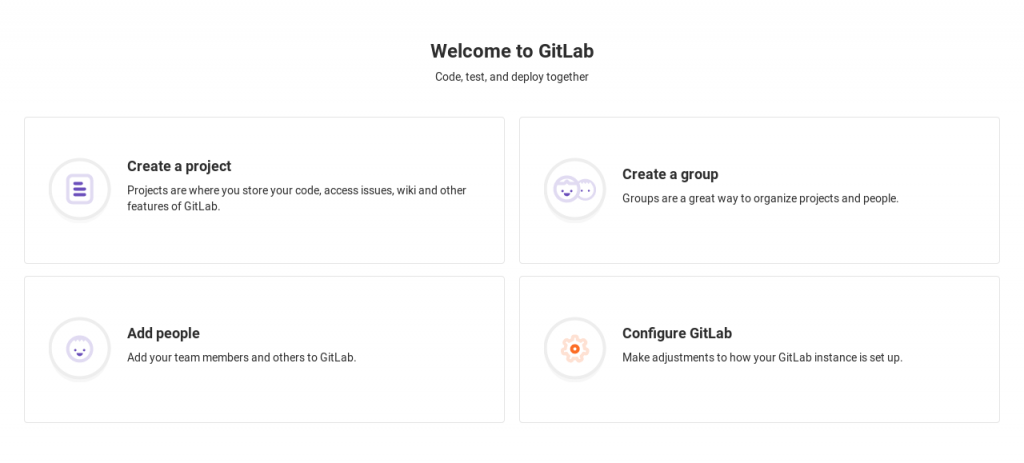
Enter the login credentials, click the Sign in button and you will be redirected to the GitLab Welcome page.

For more information, go to Gitlab About Page: https://about.gitlab.com/
That’s all for now! In this article, we have explained how to install and configure a Gitlab (Git-repository manager) on CentOS 7 or RHEL 7 Linux distributions.. If you have any questions or thoughts to add to this guide, use the comment form below to reach us.