

FTP (File Transfer Protocol) is a traditional and widely used standard tool for transferring files between a server and clients over a network, especially where no authentication is necessary (permits anonymous users to connect to a server). We must understand that FTP is unsecure by default, because it transmits user credentials and data without encryption.
In this tutorial we are going to show you how to install an FTP server on CentOS 7 as an operating system.
Connect via SSH and update all system packages
First of all, connect to your server via SSH and make sure that all the system software is up to date. To update the software installed on your server you can use the command:
# sudo yum -y update
Installing FTP server
To install vsftpd in CentOS 7, we will use the following command:
# yum install vsftpd
After the installation completes, the service will be disabled at first, so we need to start it manually for the time being and enable it to start automatically from the next system boot as well:
# systemctl start vsftpd
# systemctl enable vsftpd
Add FTP service in firewall to allow ftp ports:
# firewall-cmd --zone=public --permanent --add-port=21/tcp
# firewall-cmd --zone=public --permanent --add-service=ftp
# firewall-cmd --reload
Configuring FTP server
Once we have installed vsftpd correctly all the configuration parameters of the service will be hosted on the next route /etc/vsftpd/vsftpd.confvsftpd/vsftpd.conf
[box type=”warning” align=”” class=”” width=””]Warning: We recommend that before opening the file and making the changes to the vsftpd file we should create a backup copy in case something abnormal happens. Or this we will use the following command:
# cp /etc/vsftpd/vsftpd.conf /etc/vsftpd/vsftpd.conf.bkp
[/box]
Next, open the config file above
# vi /etc/vsftpd/vsftpd.conf
and set the following options with these corresponding values:
anonymous_enable=NO             # disable  anonymous login
local_enable=YES		            # permit local logins
write_enable=YES		            # enable FTP commands which change the filesystem
local_umask=022		              # value of umask for file creation for local users
dirmessage_enable=YES	          # enable showing of messages when users first enter a new directory
xferlog_enable=YES		          # a log file will be maintained detailing uploads and downloads
connect_from_port_20=YES        # use port 20 (ftp-data) on the server machine for PORT style connections
xferlog_std_format=YES          # keep standard log file format
listen=NO   			              # prevent vsftpd from running in standalone mode
listen_ipv6=YES		              # vsftpd will listen on an IPv6 socket instead of an IPv4 one
pam_service_name=vsftpd         # name of the PAM service vsftpd will use
userlist_enable=YES  	          # enable vsftpd to load a list of usernames
tcp_wrappers=YES  		          # turn on tcp wrappers
Now, setup SEinux to allow ftp access to the users home directories.
# useradd -m rasho -s /sbin/nologin
Now create an User for ftp access. Here /sbin/nologin shell is used to prevent shell access to the server:
#  useradd -m -c "Radenko Bogdanovic" -s /bin/bash radenko
# passwd radenko
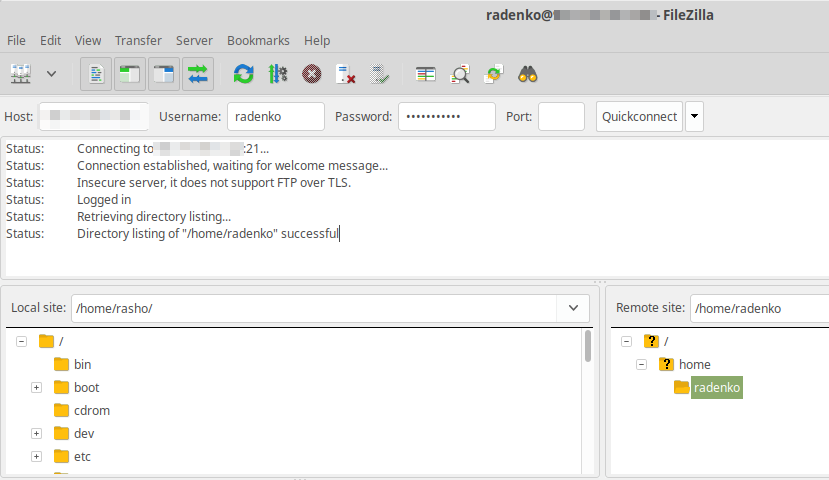
Now user rasho can able to login ftp on port 21.(You can filezilla or winscp client for accessing files.)
And that is it! You should now have vsftpd installed, setup and configured on your server. If you followed these directions you should now be able to login to the server via FTP! The only catch is that if you have a hardware firewall in addition to the servers software firewall you may need to adjust that too.

Be Sociable, Share!