

SELinux (Security Enhanced Linux) is a Linux kernel security module that allows administrators and users more control over access controls. It allows access based on SELinux policy rules.
If there is no SELinux policy rule that specifically allows access, such as for a process opening a file, access is denied.
SELinux has three modes:
- Enforcing: SELinux allows access based on SELinux policy rules.
- Permissive: SELinux only logs actions that would have been denied if running in enforcing mode.
- Disabled: No SELinux policy is loaded.
By default in CentOS 7, SELinux is enabled and in enforcing mode.
SELinux is a good security feature. But it is hard to understand and maintain. That is why small companies and startups often don’t bother with SELinux. CentOS 7 and Red Hat Enterprise Linux 7 (RHEL 7) comes with SELinux pre-installed.
In this article, I will show you how to disable SELinux on CentOS 7.
Prerequisites
Before you start to Disable SELinux on CentOS 7. You must have a non-root user account on your server with sudo privileges.
Checking the SELinux Status
First, you should check the status of SELinux is enabled or disabled in your CentOS system. To check the status of SELinux run below command:
sestatus
The output should be:
SELinux status:                 enabled
SELinuxfs mount:                /sys/fs/selinux
SELinux root directory:         /etc/selinux
Loaded policy name:             targeted
Current mode:                   enforcing
Mode from config file:          enforcing
Policy MLS status:              enabled
Policy deny_unknown status:     allowed
Max kernel policy version:      31
You can see from the output above that SELinux is enabled and set to enforcing mode.
Temporarily Disable SELinux
To disable SELinux temporarily, issue the command below as root:
echo 0 > /selinux/enforce
Alternatively, you can use the setenforce tool as follows:
setenforce 0
Else, use the Permissive option instead of 0 as below:
setenforce Permissive
These methods above will only work until the next reboot, therefore to disable SELinux permanently, move to the next section.
Permanently Disable SELinux
To permanently disable SELinux, use your favorite text editor to open the file /etc/sysconfig/selinux as follows:
sudo vi /etc/sysconfig/selinux

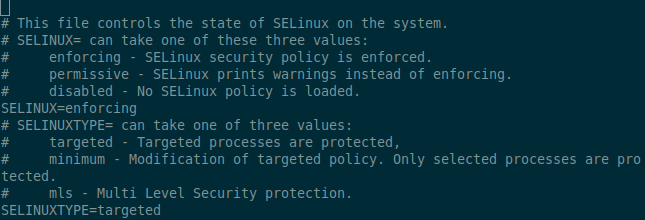
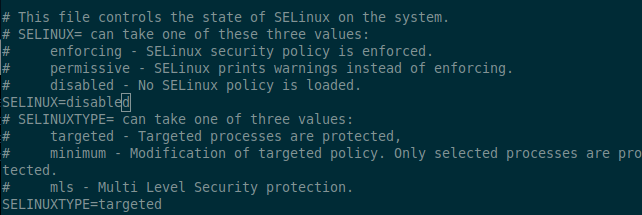
Then change the directive SELinux=enforcing to SELinux=disabled as shown in the below image.
SELINUX=disabled

Save the file and reboot your CentOS system with:
sudo shutdown -r now
Once the system boots up, verify the change with the sestatus command:
sestatus
The output should look like this:
SELinux status: disabled
Conclusion
You have successfully learned how to disable SELinux on CentOS 7. If you have any queries please don’t forget to comment out.
See also: How to disable SELinux on CentOS 8