
Now let us add some clients to monitor by Nagios server.
Add the EPEL repository to install “nagios-plugins” and “nrpe” packages in client systems.
View also: How to Enable EPEL Repository for RHEL/CentOS 6/5 and Installing Nagios-3.4 in CentOS 6.3
Nagios server:
Operating system : CentOS 6.4
IP Address : 192.168.1.80
Nagios client:
Operating System : CentOS 6.3
IP Address : 192.168.1.81
Install “nrpe” and “nagios-plugins” packages in client systems to be monitored.
[root@client ~]# yum install -y nrpe nagios-plugins-all openssl
Configure Clients
[root@client ~]# nano /etc/nagios/nrpe.cfg
## Line 81 - Add the Nagios server IP ##
allowed_hosts=127.0.0.1 192.168.1.80
Start nrpe service
[root@client ~]# /etc/init.d/nrpe start
Starting nrpe: [ OK ]
[root@client ~]# chkconfig nrpe on
To add the clients to be monitored through nagios server, open the “nagios.cfg” file in nagios server and uncomment the following lines.
Server add Clients
[root@server ~]# nano /etc/nagios/nagios.cfg
## Line 52 - Uncomment ##
cfg_dir=/etc/nagios/servers
Create a directory called “servers” under “/etc/nagios/”.
[root@server ~]# mkdir /etc/nagios/servers
Create config file to the client to be monitored.
[root@server ~]# nano /etc/nagios/servers/clients.cfg
Insert this:
define host{
use linux-server
host_name client
alias client
address 192.168.1.81
max_check_attempts 5
check_period 24x7
notification_interval 30
notification_period 24x7
}
Restart nagios service.
[root@server ~]# /etc/init.d/nagios restart
Running configuration check...done.
Stopping nagios: .done.
Starting nagios: done.
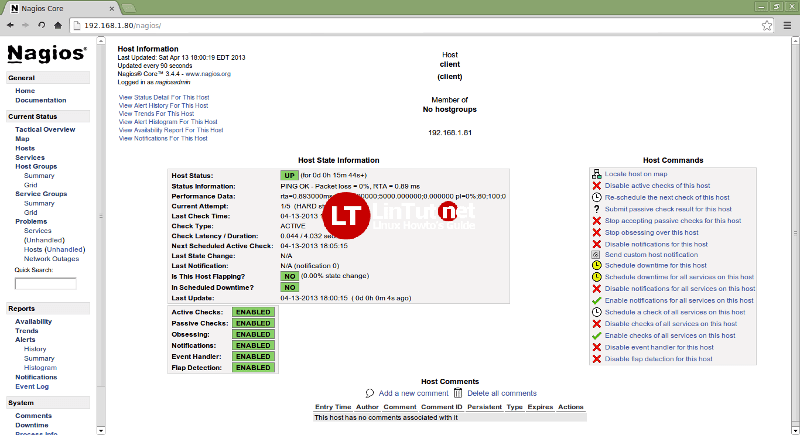
Now open the nagios admin console in the browser and navigate to “hosts” section in the left pane. You will see the newly added client will be visible there. Click on the host to see if there is anything wrong or alerts.

