
OpenSSH remains the backbone for secure remote access in Linux environments, powering everything from routine server management to automated deployment pipelines. However, leaving your OpenSSH server running with default settings can invite needless risks such as brute-force attacks, unauthorized access, or session hijacking. In this article, leveraging over 15 years of sysadmin experience managing Debian, Ubuntu, RHEL, CentOS, and Arch servers, I will walk you through pragmatic steps to secure and harden your OpenSSH server. This guide blends proven best practices with actionable advice to help you build a resilient SSH environment that balances security without compromising productivity.
Why Hardening OpenSSH is Crucial
Having managed servers in critical production environments, I’ve seen firsthand how a poorly secured SSH service is often the weakest link in overall system security. Attackers frequently scan for accessible SSH ports and then attempt dictionary or brute-force attacks against user accounts, including root. Once an intruder gains shell access, the consequences can be catastrophic ranging from data theft, service disruption, or the server becoming part of a botnet. The default OpenSSH configuration prioritizes compatibility and usability but is not optimized for defense. So hardening your SSH setup is not optional but a baseline security hygiene for any serious Linux administrator.
1. Switch to SSH Key-Based Authentication and Disable Passwords
A mistake I often see in small to medium setups is relying solely on password authentication for SSH. Passwords, especially weak or reused ones, are the easiest attack vector for brute force attempts. Instead, use SSH key pairs for passwordless authentication — they leverage asymmetric cryptography with a public and private key pair, which is far more resilient.
ssh-keygen -t ed25519

Generating public/private ed25519 key pair.
Enter file in which to save the key (~/.ssh/id_ed25519):
Enter passphrase (empty for no passphrase):
Your identification has been saved in /home/user/.ssh/id_ed25519
Your public key has been saved in /home/user/.ssh/id_ed25519.pub
The key fingerprint is:
SHA256:abc123xyz... user@hostname
The key's randomart image is:
+--[ED25519 256]--+
|     ..          |
|    .oo          |
|   o+=o          |
|   ...           |
|  .o.  S         |
| ..o             |
|.E+..            |
|.+*-o            |
|+=+*+            |
+----[SHA256]-----+
This command generates an Ed25519 key pair — currently recommended for SSH keys due to better security and performance compared to RSA. You store the private key securely on your client machine and copy the public key to the server’s ~/.ssh/authorized_keys file. Afterwards, you disable password authentication in your SSH server config /etc/ssh/sshd_config by setting PasswordAuthentication no. This effectively limits login only to users with the right private key, blocking brute-force password guessing attempts.
2. Prohibit Empty Passwords to Avoid Oversights
In multi-user environments, a common oversight is creating new user accounts without setting passwords, especially during onboarding or automated provisioning. This creates a silent vulnerability where accounts allow passwordless login unintentionally.
grep PermitEmptyPasswords /etc/ssh/sshd_config

PermitEmptyPasswords no
Setting PermitEmptyPasswords no instructs OpenSSH to reject SSH attempts from users with empty passwords, ensuring no “backdoor” loopholes. This is a lightweight safety check that every sysadmin should verify on production servers to avoid accidental exposures.
3. Disable Direct Root Login Over SSH
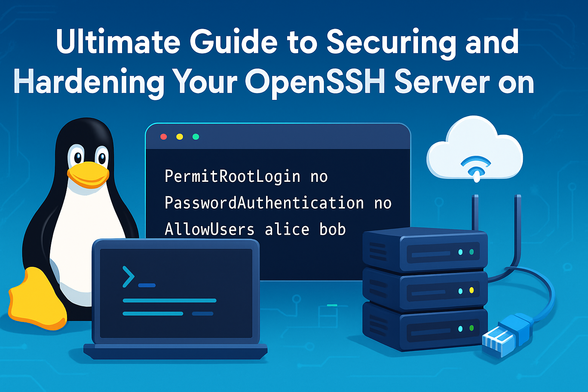
Root is the most privileged user on Linux, and allowing direct root SSH login is like leaving your house door wide open. As a best practice, always disable root SSH logins and require admins to authenticate using a regular user account then escalate privileges with sudo. This approach introduces an audit trail and reduces attack surface.
sed -i 's/^#PermitRootLogin yes/PermitRootLogin no/' /etc/ssh/sshd_config

grep PermitRootLogin /etc/ssh/sshd_config

PermitRootLogin no
Editing the PermitRootLogin directive to no stops SSH root access completely. This practice has saved me countless hours during incident investigations, as attackers tend to target root by default. By forcing non-root login, you add a crucial hurdle for unauthorized access.
4. Ensure You Use SSH Protocol 2 Exclusively
SSH protocols 1 and 2 are fundamentally different. Protocol 1 has multiple security flaws and is considered deprecated. Modern OpenSSH distributions now default to Protocol 2 only, but it’s smart to explicitly enforce it.
grep Protocol /etc/ssh/sshd_config

Protocol 2
The Protocol 2 setting ensures SSH connections use the robust, modern cryptographic algorithms. If you try to connect with ssh -1 to force protocol 1, you will usually see errors indicating it’s unsupported, meaning your server is safe by default. I always verify this on newly deployed servers to exclude legacy protocol risks.
5. Configure SSH Idle Timeout to Automatically Disconnect Stale Sessions
An often-overlooked risk is unattended SSH sessions staying open indefinitely. If you step away from your desk or lose network connection, an active SSH session left logged in can be hijacked by anyone with local access or by attackers if your machine is compromised.
vim /etc/ssh/sshd_config

# Add or modify the following lines:
ClientAliveInterval 180
ClientAliveCountMax 0
ClientAliveInterval sets how often the server sends keepalive messages (in seconds), and ClientAliveCountMax defines how many unanswered keepalives will trigger disconnect. Here, setting ClientAliveInterval 180 and ClientAliveCountMax 0 means the server will disconnect the client after 3 minutes of inactivity. This prevents orphaned sessions from lingering, reducing post-compromise risk. In production, I usually set these values slightly longer depending on operational needs.
6. Limit SSH Access to Specific Users or Groups
Rather than leaving SSH open to all user accounts, a best practice is restricting access to a whitelist of authorized users. This way, if an unauthorized user tries to log in, the server will deny them immediately at the authentication stage.
echo "AllowUsers lintut rasho" >> /etc/ssh/sshd_config

grep AllowUsers /etc/ssh/sshd_config

AllowUsers lintut rasho
Here, SSH connections are limited only to users lintut and rasho. I often employ this directive on servers with multiple users but where only a few need SSH access. You can also use AllowGroups to grant access to an entire group. This technique adds a valuable control layer beyond password or key restrictions.
7. Restrict Maximum Authentication Attempts to Mitigate Brute Force
Attackers typically try to guess passwords by making repeated login attempts. By limiting the number of failed attempts, you reduce the likelihood and impact of brute-force attacks.
grep MaxAuthTries /etc/ssh/sshd_config

MaxAuthTries 3
The MaxAuthTries directive limits the allowed consecutive authentication attempts per connection. Setting it to 3 is a good balance between usability and security. If someone fails three times in a row, the server drops the connection, slowing down brute-force tools that depend on unlimited attempts. Combining this with external tools like Fail2Ban further strengthens SSH defense.
Additional Pro Tips from the Field
In practice, the OpenSSH hardening checklist doesn’t stop here. I recommend these complementary measures:
- Change default SSH port: While security by obscurity is not a replacement for solid configs, moving SSH off port 22 reduces automated scans and noisy brute-force attempts.
- Install Fail2Ban: This blocks IPs exhibiting suspicious login patterns, providing adaptive defense against repeated unauthorized attempts.
- Use Two-Factor Authentication (2FA): Adding an additional OTP layer dramatically improves account security, especially for critical admin users.
- Review SSH logs regularly: Monitoring
/var/log/auth.logor the equivalent for your distro can alert you to unusual activity early.
Conclusion
Securing your OpenSSH server is a fundamental responsibility that no Linux sysadmin should overlook. Throughout my years managing hundreds of diverse production servers, these proven strategies consistently help prevent unauthorized entry and reduce attack surfaces without hampering legitimate access. Implement SSH key-based authentication, disable root login, enforce protocol 2, set idle timeouts, restrict users, and cap authentication attempts to build layered security. Periodically audit your SSH configuration and logs while complementing with external tools like Fail2Ban and 2FA for robust defense in depth. Follow these practical steps, and you can confidently expose SSH to the internet without worry.
